10 Eylül 2015 Perşembe
How to delete old kernels in Ubuntu using Ubuntu tweak GUI
Kernel is an important part of Linux system. When you upgrade to new kernel version, the old kernel will be left in your system . As time goes by, this might consume your hard drive and cause problem to your system.
One of the examples that old kernel might do to your system is the system unable to install update from Ubuntu Software updater. When you click "Install Now" button, an error will occur .
"The upgrade needs a total of 79.0M free space on disk '/boot'. Please free at least an additional 7,381k of disk space on '/boot' .Empty your trash and remove temporary packages of former installation using 'sudo apt-get clean' "
One of the reasons why this problem happens is because the old kernel images are filling up your /boot drive partition .
There are few ways on how to remove old kernel. In this tutorial, I share on how to remove old kernel file images using Ubuntu Tweak program.The guide below will help you to install and delete old kernels using the program
1) Download Ubuntu Tweak program
1.1)Download Ubuntu Tweak from their website
 |
| Downloading Ubuntu Tweak |
1.2)Double click the download file and finish the installation from Ubuntu Software Centre.
 |
| Ubuntu Software Centre |
2)Run Ubuntu Tweak and delete old kernels
2.1)Search Ubuntu Tweak from Ubuntu dash panel and run the program.
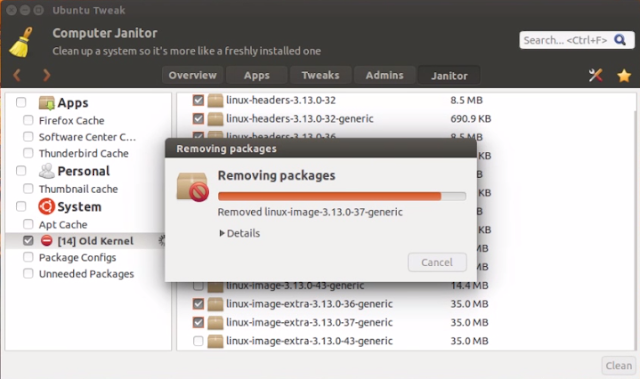
2.2)On the Top side panel click "Janitor" and tick "Old kernel" under System.
2.3)Check your latest kernel version from the terminal by typing
orca@Positive-Space:~$ uname -r
2.4) Click the old kernel that you want to delete and click "clean" to delete old kernels. It is a good practice to keep previous latest old kernel version on your system .
 |
| Removing unwanted kernel |
 |
| Remaining kernel |
3)Reboot your system try to update your system again . ;)
Read Previous : How to make batch text watermark image in Ubuntu.Few seconds!
Kaydol:
Kayıt Yorumları (Atom)


Hiç yorum yok:
Yorum Gönder